
4-3. RAMP-Settings
4-3. Ramp Settings
Register the endpoints you implemented, and configure fees, display labels, and authentication.
Path — Project ONEramp → Settings (Ramp Settings)
- Use the Mainnet / Testnet switch at the top right to manage settings per network.
- Settings and the RAMP Contract are completely separate per network. Check which tab you are on before making changes.
The wallet connection can drop. Navigating between pages or switching the network tab may disconnect it. If
Deploy Contractdoes not respond, reconnect the wallet at the top right and try again.
- Changes are saved only after you click
Save Changesat the bottom right.
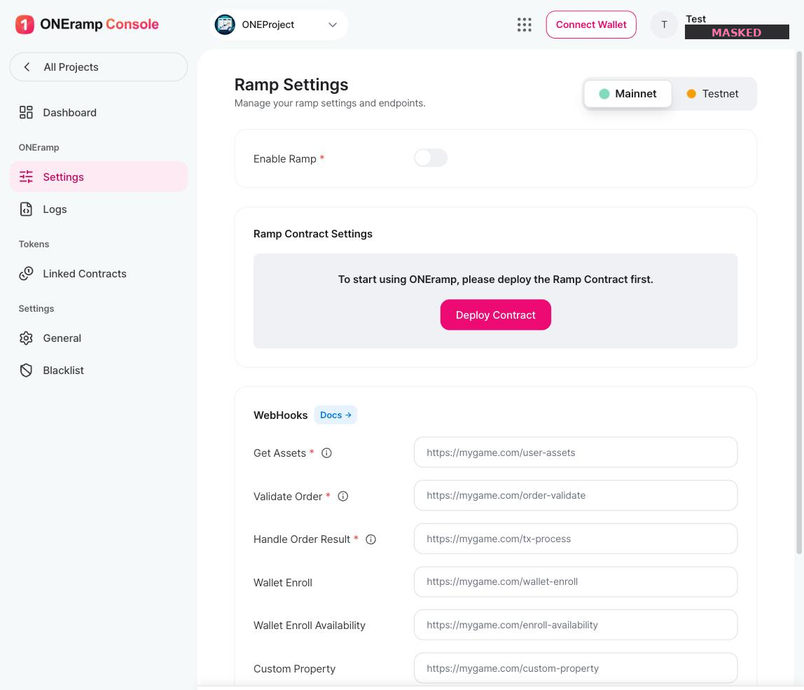
4-3.1 Enable Ramp
- The required toggle that turns the entire RAMP feature on and off.
- Enable it last, after completing all of the settings below.
4-3.2 Ramp Contract Settings
- Before the RAMP Contract is deployed, only a notice and the
Deploy Contractbutton are shown. - Deployment procedure → 4-2.2 Deploying the RAMP Contract
After deployment, you review and manage contract information in this area.
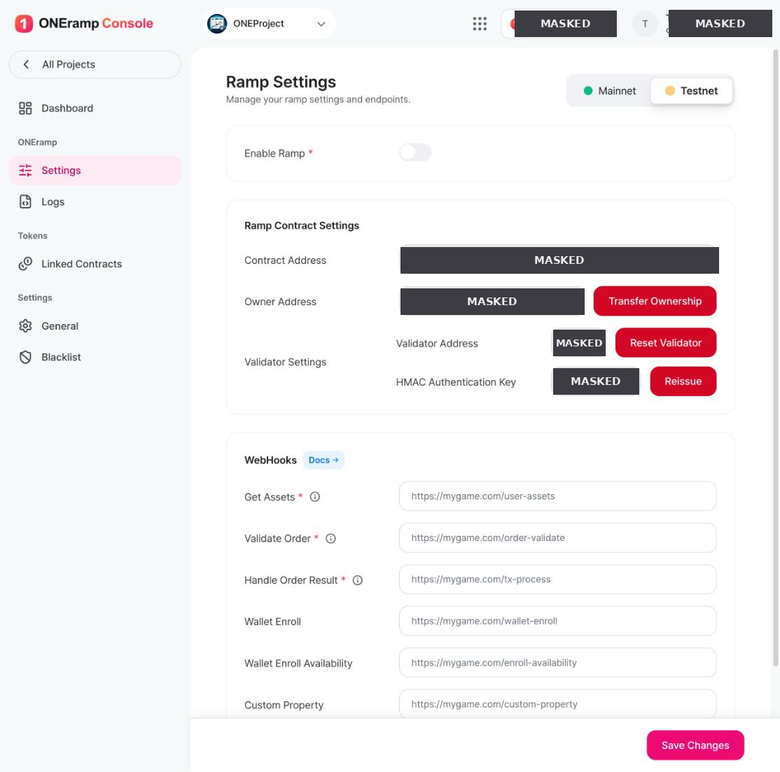
| Item | Description | Button |
|---|---|---|
| Contract Address | Address of the deployed RAMP Contract | Copy |
| Owner Address | Address holding contract administration rights | Transfer Ownership |
| Validator Address | The registered Validator address | Reset Validator |
| HMAC Authentication Key | Integrity verification key for RAMP ↔ your server | Reissue |
- This is the screen where you view and reissue the HMAC Key.
Reissue,Reset Validator, andTransfer Ownershipinvalidate the existing value immediately. Coordinate them with your plan to swap the game server environment variables. → 4-2.2
4-3.3 WebHooks — Endpoint Registration
Register the URLs you implemented on your server. Use HTTPS only, and make sure the firewall allowlist is in place so RAMP B/E can reach them.
- All three are required.
- If your Testnet and Mainnet servers differ, switch the network tab and register each one separately.
4-3.4 Fee Settings
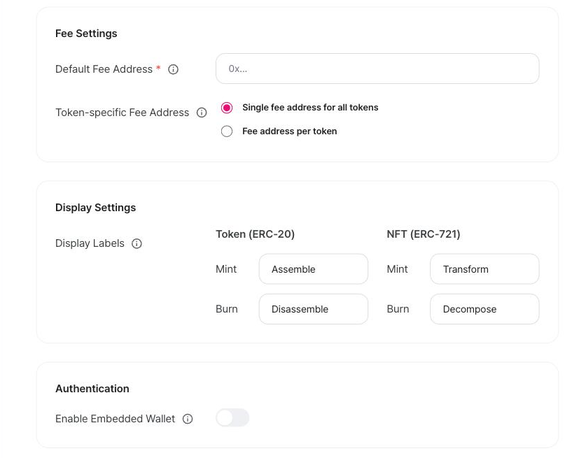
Default Fee Address(required) — the default wallet address that receives fees (0x…)Token-specific Fee Address— whether to use per-token fee addressesSingle fee address for all tokens— all tokens share one default address (default)Fee address per token— assign a separate fee address to each token
The fee rate is specified by your game backend as
intent.mint_fee_bpswhen callinginitialize. → 5.3
Policy
- The fee rate must be at least 10%, and the receiving address must be a NEXUS wallet address.
- Collected fees are returned to users through the Rewards program.
- Example:
mint_fee_bps: 1000(10%) → when a user mints 1 token, the user receives 0.9 and the fee wallet receives 0.1
For the development team
intent.mint_fee_bpsin theinitializerequest must match the contracted rate (1000= 10%).intent.burn_fee_bpsis fixed at0.- Verify the actually applied values with
intent.fee_rateandintent.actualin the result Webhook. → 5.6
If you register only the address in the console and omit
mint_fee_bps, the intended fee will not be collected.
4-3.5 Display Settings
Sets the Mint/Burn button labels shown in RAMP F/E.
| Asset type | Mint default | Burn default |
|---|---|---|
| Token (ERC-20) | Assemble | Disassemble |
- You can change them to fit your game's world (for example, Craft / Dismantle).
- Maximum 15 characters
4-3.6 Authentication
Enable Embedded Wallet— whether to use the embedded wallet- When enabled, users can use a wallet inside RAMP F/E without a separate wallet app.
- If you load RAMP F/E in an in-game WebView on iOS or Android, you must load it using the native WebView components.
- iOS: use
SFSafariViewControllerorASWebAuthenticationSession - Android: use
ChromeCustomTabs
- iOS: use
Updated about 2 months ago